

Improved UX for adding participants to a new appointment
Based on user-feedback, the design has changed to make it easier to add and select contacts and participants in a new appointment.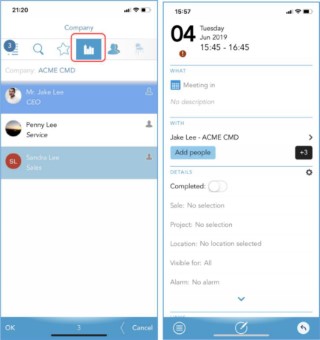 When you create a new appointment and click on Add people the default search view is for either Company or Contact. If you find a company name via this, you can add the company as a participant.
However, if you narrow your search by clicking on the Company icon on the top, you not only find the company you search for, but when you click on the company name, you see all the contacts registered against it.
This is helpful if you don’t remember the person’s name, but you remember the name of the company the person works for.
It also lets you add multiple participants from a single company from this view. Click on the names you want to add to your appointment. Each name you select is automatically added to your appointment when you click OK.
These changes make creating the appointment both easier and more efficient.
When you create a new appointment and click on Add people the default search view is for either Company or Contact. If you find a company name via this, you can add the company as a participant.
However, if you narrow your search by clicking on the Company icon on the top, you not only find the company you search for, but when you click on the company name, you see all the contacts registered against it.
This is helpful if you don’t remember the person’s name, but you remember the name of the company the person works for.
It also lets you add multiple participants from a single company from this view. Click on the names you want to add to your appointment. Each name you select is automatically added to your appointment when you click OK.
These changes make creating the appointment both easier and more efficient.
Better user experience for editing an appointment
Another feedback given to us by users was that the edit option was not easily found.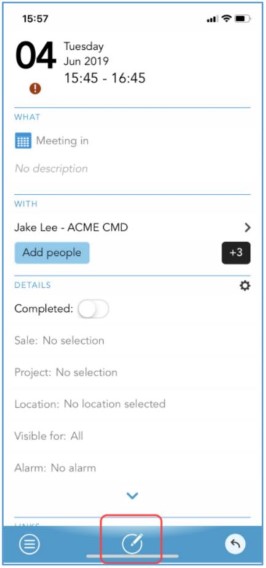 Now, instead of being a menu option hidden under tasks, it is a separate icon placed prominently placed in the bottom center.
If you want to edit a saved appointment and make changes (for example to the time, place, or participants) you click on the icon, and then you can edit whatever you need to, in your appointment screen then click Save.
Now, instead of being a menu option hidden under tasks, it is a separate icon placed prominently placed in the bottom center.
If you want to edit a saved appointment and make changes (for example to the time, place, or participants) you click on the icon, and then you can edit whatever you need to, in your appointment screen then click Save.
More optional fields available in the business card scanner
You can now register more information when you scan a new business card.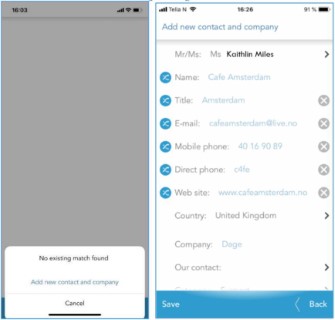 When you click on New, in the bottom-left corner, you can choose to Scan a business card. Next choose Add new contact and company.
Once you’ve taken a picture of your business card, SuperOffice will register all the fields it recognizes.
Once you’ve removed the field you do not want to register you can press Save.
When you click on New, in the bottom-left corner, you can choose to Scan a business card. Next choose Add new contact and company.
Once you’ve taken a picture of your business card, SuperOffice will register all the fields it recognizes.
Once you’ve removed the field you do not want to register you can press Save.