Overview
- Order the public domain key for your domain.
- Add the key to your domain’s DNS record so recipients can retrieve it for reading the DKIM header.
- Tell SuperOffice that DKIM is set up - to turn on email signing to begin adding the DKIM header to outgoing mail messages.
- Mailgun as our mail service (the email service to use to send the email - permitted to send email on behalf of your domain).
- Google Workspace domain email address to “send as” (your ‘domain’ as the sending email, in other words, what you see in ‘from’ address in your mailings and email).
This Google account’s domain is hosted by Enom. Your domain settings and DNS may differ. Please contact your DNS support team for assistance.
Order a DKIM for your domain name
To be able to create a DKIM for your domain name, we need to know your domain name. To make sure no one else, besides your company orders a DKIM key for your domain name, we need to make sure you are the owner of this domain name.- Fill in the DKIM ORDER FORM and submit it.
- We will reply with the DKIM to the submitted email address.
- You will now need to add this DKIM to your DNS, see the next step.
Need to send from more than one domain? Multiple DKIM records let you sign each domain with its own key, available as part of an ongoing pilot.
Open the domain settings for the Google domain
-
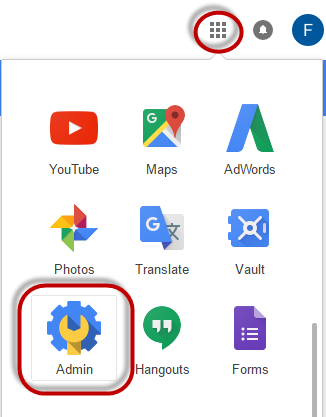
Log in to Google with your Google Administrators account, and open your Google Admin section.
-
Open Domains.
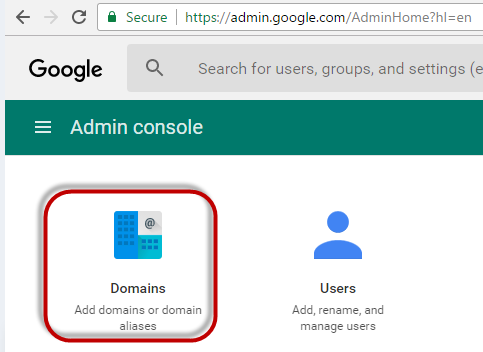
- The icon for opening Domains may be hidden by default and is then found under More controls.
-
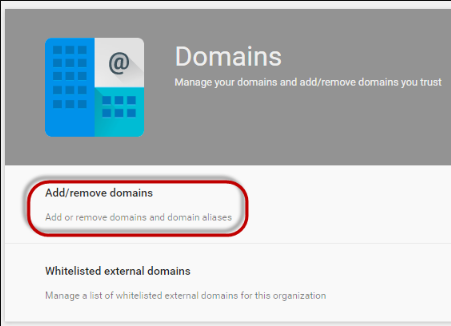
Under Domains, open Add/remove domains.
-
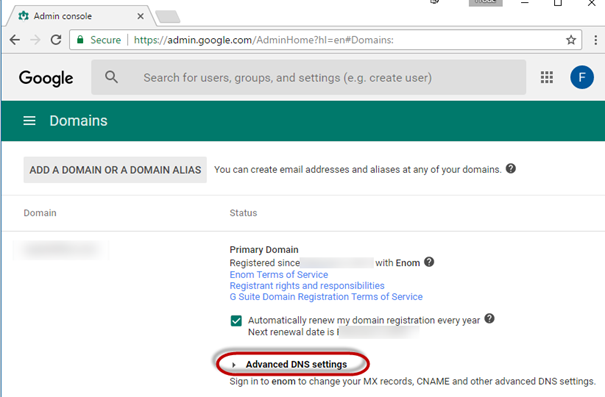
Click Advanced DNS settings to see your details.
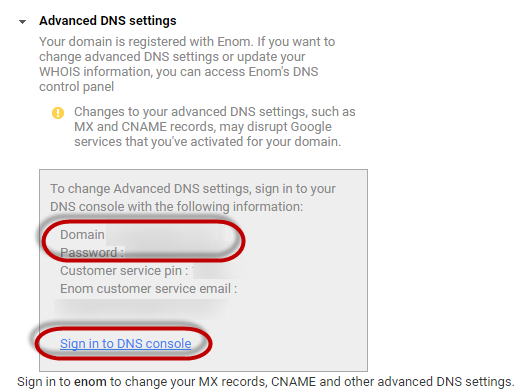
- Click Sign in to DNS console to open the DNS console window. You may have to sign into this DNS console with a separate DNS account.
Add the DKIM record
-
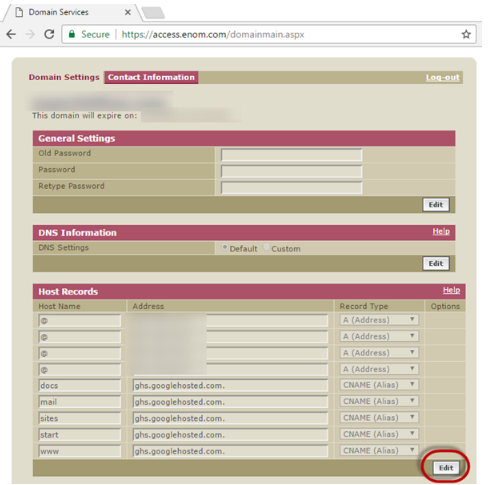
Go to Host Records in the DNS console. The existing records for your Google account are there by default.
-
Next, add the DKIM record from Mailgun:
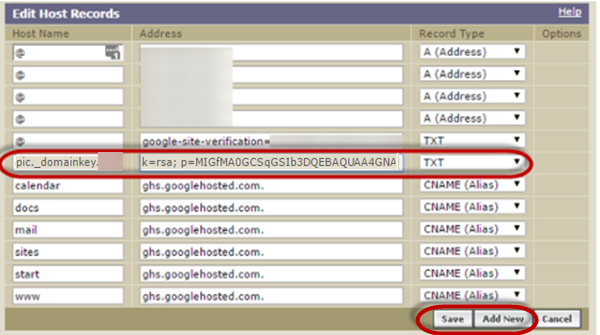
- Click Add New to add the new DKIM record.
-
Enter the Host name value you received from SuperOffice (
xxx._domainkey.[yourdomainName]). -
Enter the Address value you received from SuperOffice (
k=rsa; p=XXX...).Some DNS servers may require version of DKIM. If you are sure your DNS needs it, addv=DKIM1;in front of the key. Example:k=rsa; p=XXX...becomesv=DKIM1; k=rsa; p=XXX... - Choose TXT as the record type.
-
You also need to establish an SPF record. This identifies the mail servers authorized to send (and/or can’t send) emails on your domain’s behalf. For DKIM usage, include
_spf.online.superoffice.com ~all(orinclude:mailgun.org ~all) to enable email sending and receiving. Read this article on how to update the spf record. - Click Save to update the information.
Once you’ve added the records and they’ve propagated, it can take 24-48 hours for DNS changes to propagate.
Test a new DKIM record
Use a tool to make sure the DKIM is propagated. Via CMD:-
Open Windows Command Prompt: Press Win+R, type
CMD, and click OK. -
Type
nslookupand press Enter. -
Type
set type=txtand press Enter. -
Type:
xxx._domainkey.yourdomainNameand press Enter.
-
Open the DKIM tool:
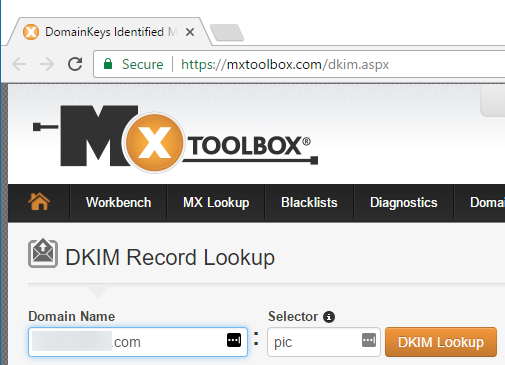
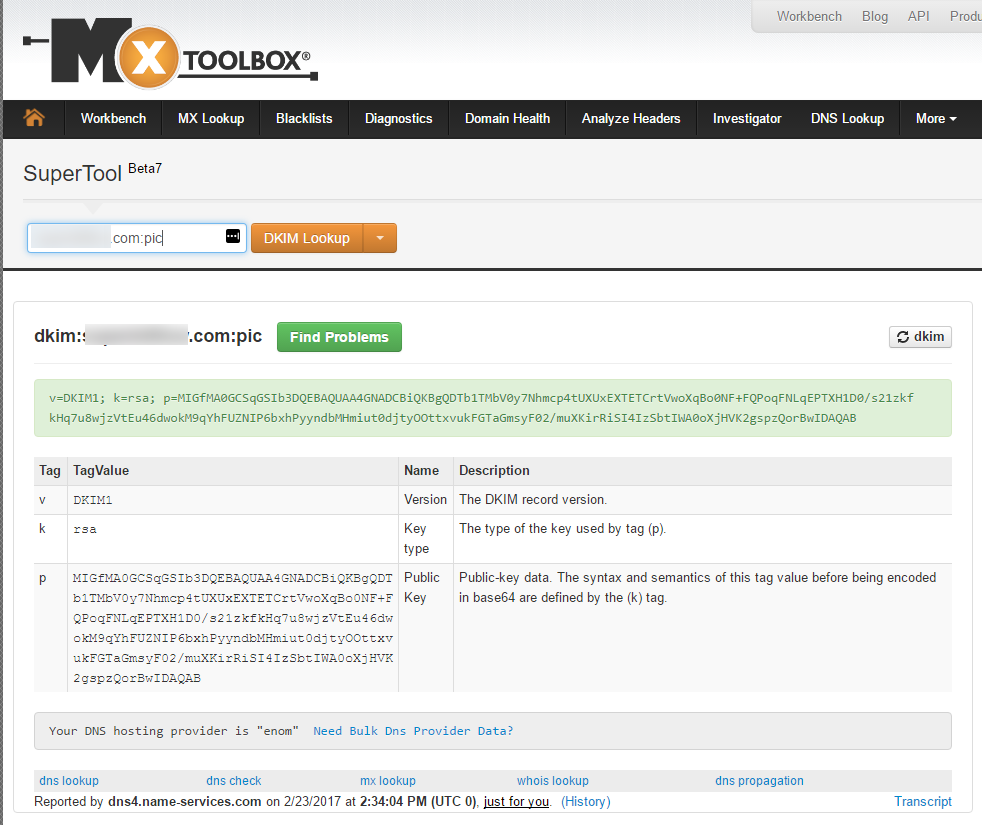
- Add your domain name and the “DKIM Selector” you received from SuperOffice, and click DKIM Lookup.
-
The result should show the values of your public DKIM key data: