A beginner’s guide to Git - step-by-step instructions for daily tasks in different tools
This tutorial walks you through the most common Git tasks on your local computer. We show the Git Bash command line and Visual Studio Code (VS Code) side-by-side.Working locally has many benefits:
You can still be productive with no or bad internet connection. Long commute? No problem.
You get to choose the Markdown editor and customize it to your preferences.
You can leverage powerful search and file operations.
If you don’t have Git installed, you will need to install Git first. You can find instructions on installing Git in the free Pro Git book, written by Scott Chacon and Ben Straub.
At the beginning of the workday, it is good practice to always get the latest updates from the branch you are going to work on. This is called to pull.
Git Bash command line
VS Code
Go to the repo folder.
Run git pull:
git pull
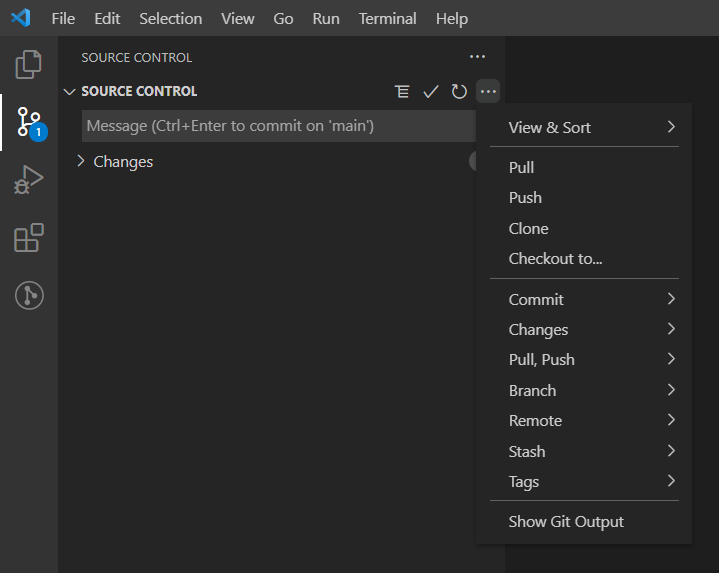
Click the source control icon.
Expand SOURCE CONTROL and click the three dots to show more actions.
If you are going to resume work where you left off the previous day, congratulations! You’re already good-to-go with the latest updates.To start something new, you need a GitHub issue and a Git branch.Let’s assume the issue is already on the backlog and assigned to you.
Go to GitHub.
Move the issue from To do to In progress to let your peers know what you are working on.
Note the issue number.
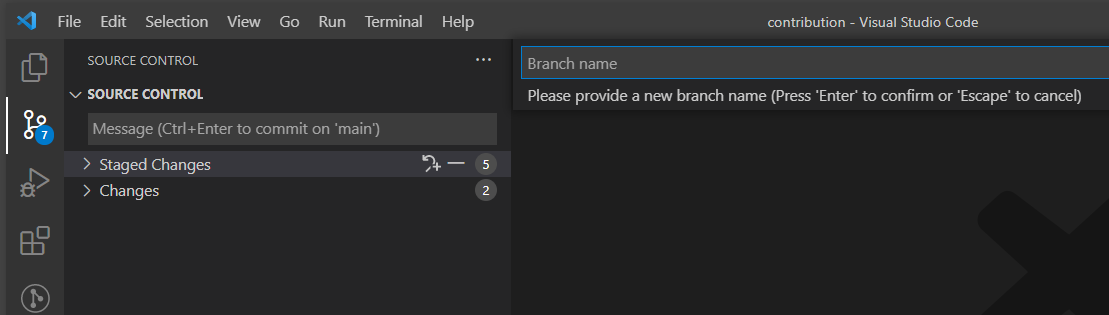
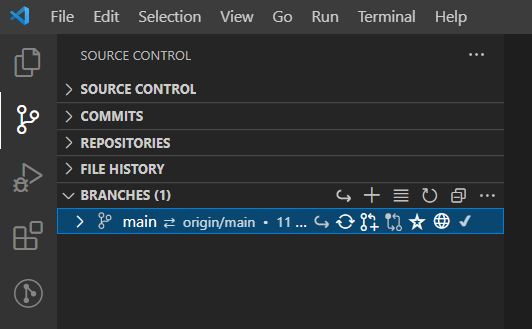
You can now create a new branch:
Git Bash command line
VS Code
Go to the repo folder.
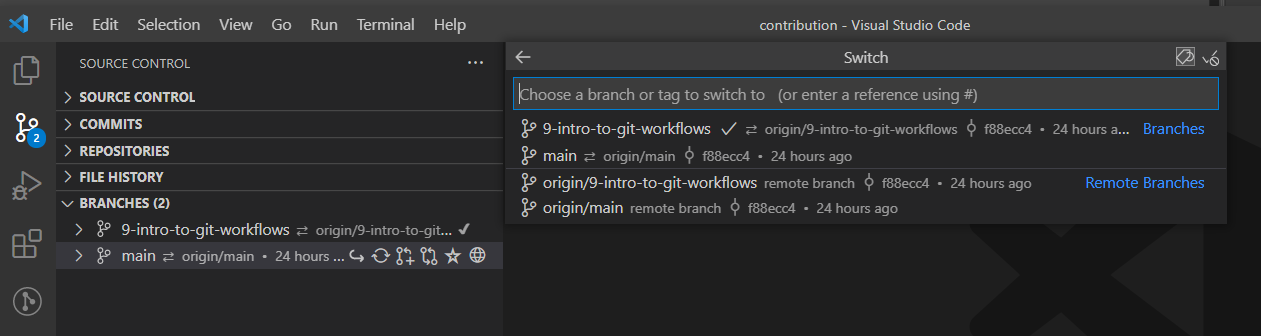
Run git switch:
git switch -c [INSERT NEW BRANCH NAME]
The -c means create. Follow branch naming conventions, starting with the issue number. For example, “256-release-notes-10.1.1”.
Option 1:
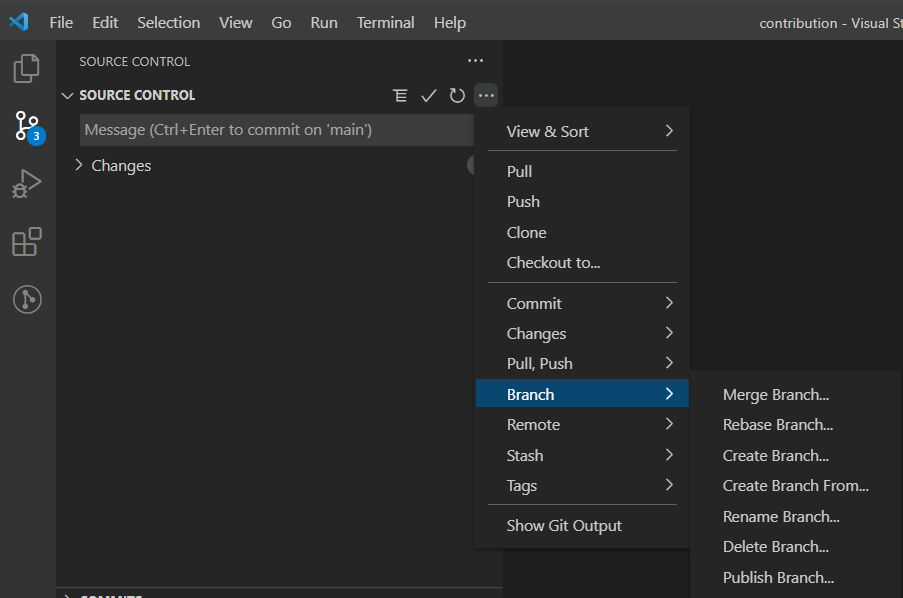
Click the source control icon.
Expand SOURCE CONTROL and click the three dots to show more actions.
During the workday, it might be a good idea to get additional updates from your colleagues. Simply pull on your current branch as you did earlier.If your team is working on the same files, you might run into merge conflicts. More on handling these later. For now, here’s a few tips to avoid conflicts:
Commit before you pull (or switch branches)
Pull before you push
If you’re not ready to commit yet, you can stash the changes for later.
Save the changes to your local disk (normal Save file).
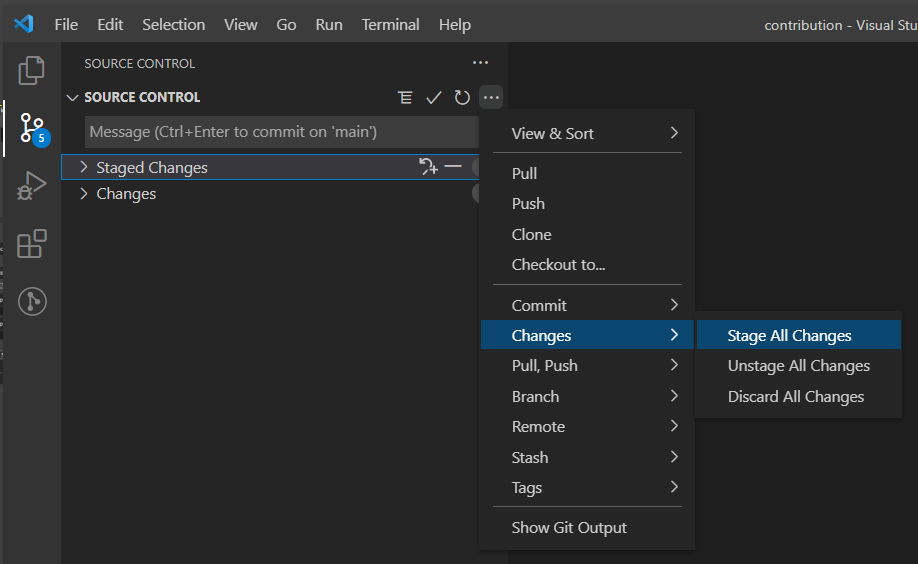
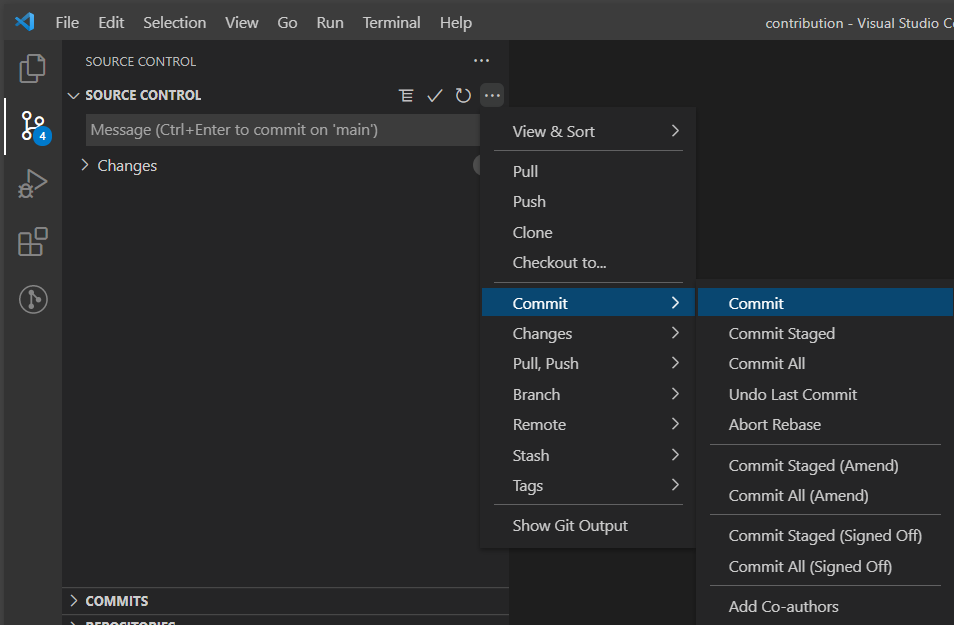
Save the changes to your local Git repo (the clone). In Git terms, this is to stage and commit.
Stage (add) means to prepare the set of changes you want to add to Git version control.
Commit means to create a snapshot of those changes, adding a new version of those files to the Git history.
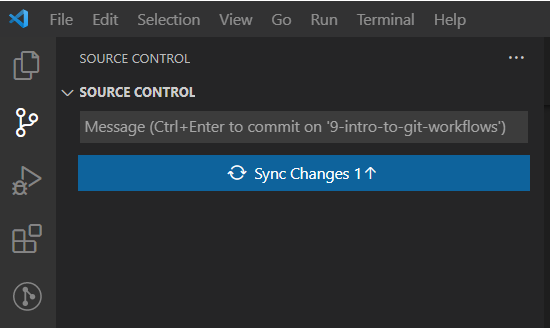
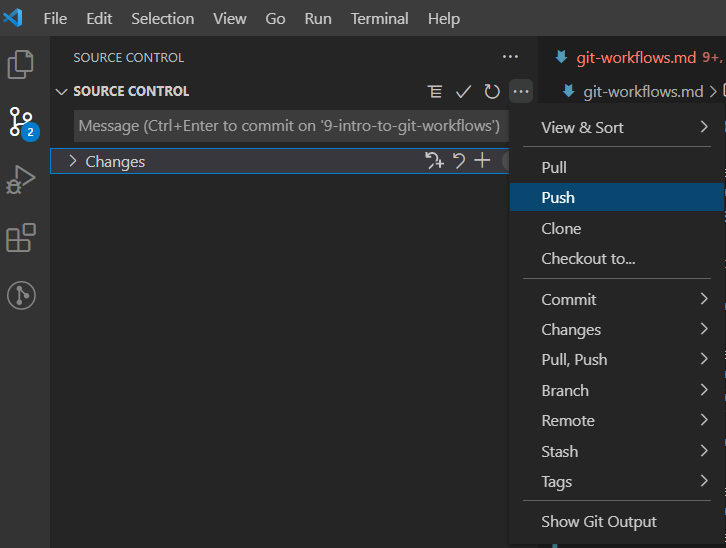
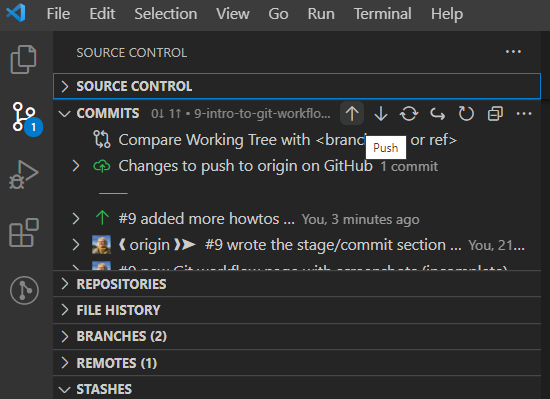
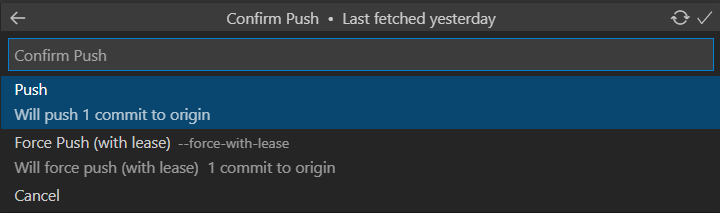
Publish the changes to GitHub (sync to cloud). In Git terms, push.
Adding the issue number (for example #256) somewhere in the commit message automatically links your changes to the issue and lets others see what has been done.
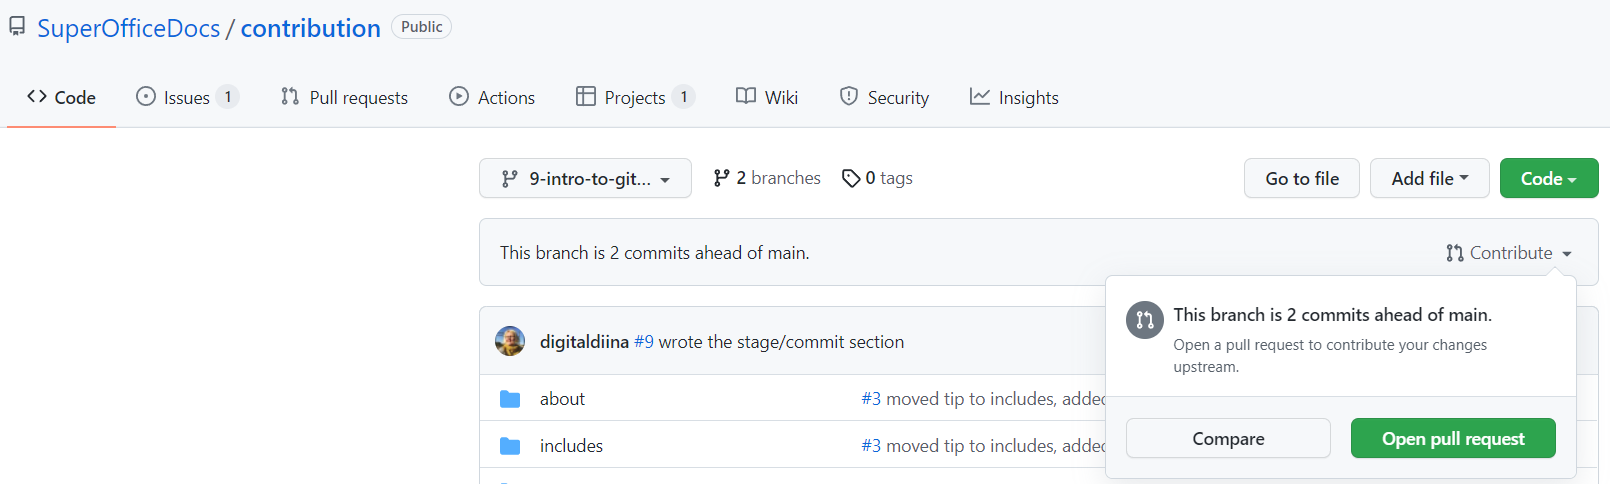
Go to the repo on GitHub.com. GitHub should detect the updated code and prompt you to make a pull request.
Click the Compare and create pull request button.It might also look like this:
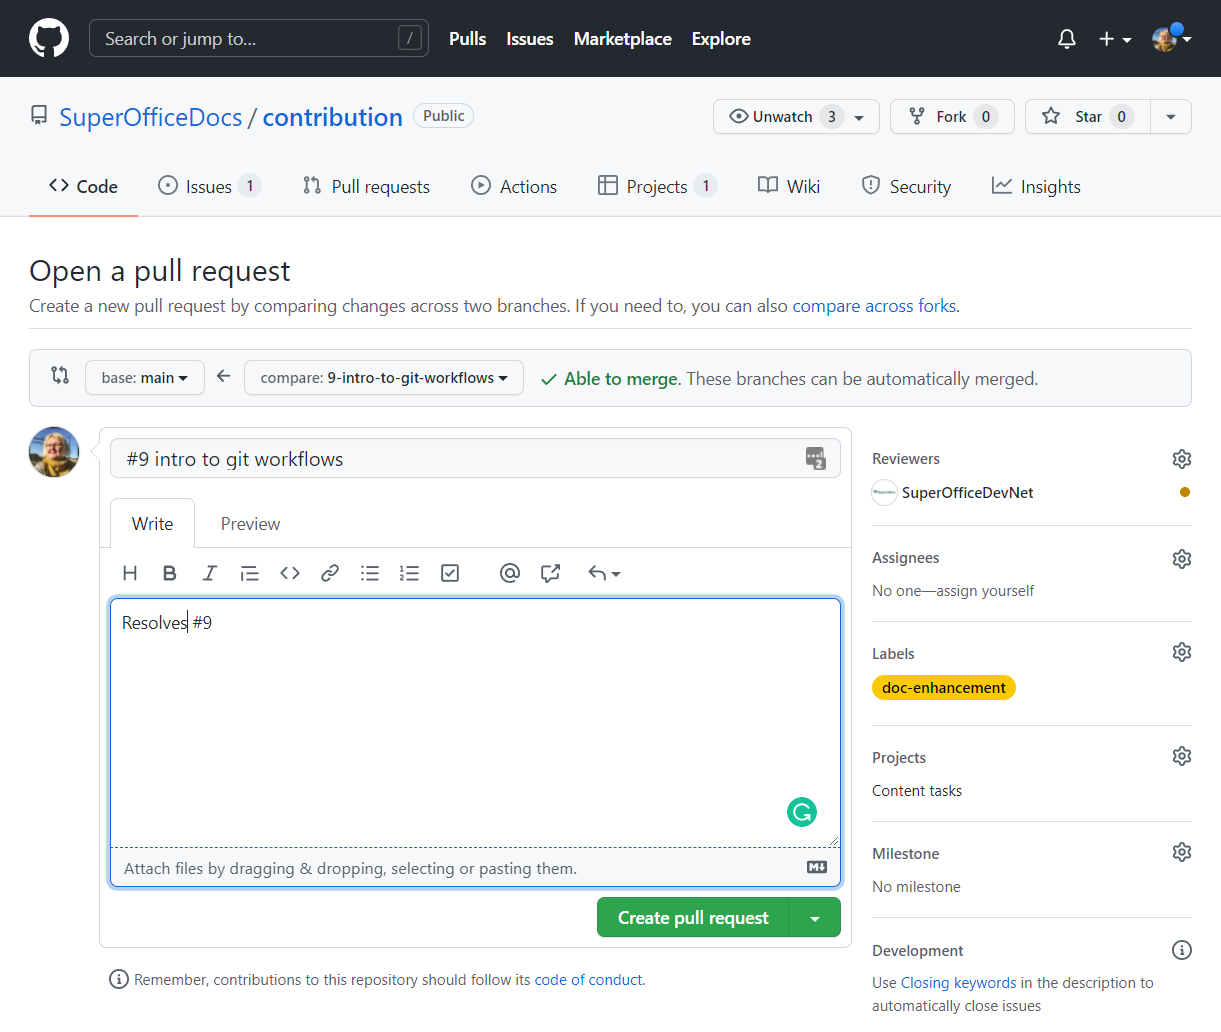
Fill in info such as title and description and select a reviewer.In the description or comments section be sure to include the text “Resolves #[INSERT ISSUE NUMBER HERE]” where your previously created issue number is associated with this pull request.
Before you clock off, clean up your desk so to speak. The longer you accumulate stuff locally, the harder it can get to sync up with your team eventually.Also, I sleep better at night knowing my content is safe in the cloud and not just on my hard drive.If you’ve worked on one issue only: