

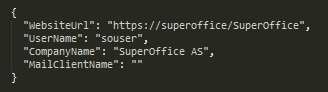
 When deploying through GPO or other alternatives, executing the SoConfig file during the log-on process will set up WebTools for the user. The site will not be added again if it has already been added.
If you are not the administrator, you get WebTools installed in c:\users\<yourname>\appdata\local\SuperOffice. To install on C:\Program files, you need to be the local administrator.
Overview
- Extract required files from the WebTools installer.
- Distribute the MSI files (using GPO or SCCM tools) to all machines that are going to use WebTools.
- Auto-configure the URL and settings using a script.
Pre-requisites
- Username in SuperOffice must be the same as in ActiveDirectory (sAMAccountName).
- SuperOffice needs to be configured to use Active Directory as the authentication method for all users.
- SuperOffice Web needs to be configured to use Windows Authentication on the website.
- We also recommend to disable the WebTools upgrade dialog.
- Blocking applications must be closed.
- Libraries must be installed before any SuperOffice plugins are installed.
Steps
Select your WebTools version to see the deployment steps:- WebTools 13.1.80 and older
- WebTools 13.2.3 and newer
Do not run Outlook.exe as administrator (then you do not run it as “your own local user”) and that will not work for MailLink.
Step 1: Extract required files
You need SoCrossTableInstaller.msi, SuperOffice.MailLink.Setup.msi, and SuperOffice.Web.Extensions.msi.- Download the WebTools installer from the Download Service or from inside the SuperOffice CRM Download menu.
-
Extract the installers out of the WebTools installer:
SuperOffice.Web.Tools.exe /k /d C:\Temp -
Run
SuperOffice.MailLink.Setup.exebut do not finish the installation. While keeping the installer on-screen:- Go to the %temp% folder.
- Locate a folder where the installer unpacked the MailLink files.
- Copy the SuperOffice.MailLink.Setup.msi file out of it.
-
Run
SuperOffice.Web.Extensions.exeas above to obtain SuperOffice.Web.Extensions.msi. - To get SoCrossTableInstaller.msi, download CrossTable viewer from inside the SuperOffice Web Download menu and follow the same procedure to extract the MSI from the %temp% folder.
Steps 2-3: Deploy and configure MSI files
- Copy the below code-lines to Notepad or another text editor and save as InstallWebTools.cmd:
- Copy the below code-lines to Notepad or another text editor and save as SuperOfficeWebToolConfiguration.cmd:
- Install all MSI packages using the InstallWebTools.cmd script. It also copies the SuperOfficeWebToolConfiguration.cmd script to the Start menu for all users and removes the default Web Extensions link.
-
Edit SuperOfficeWebToolConfiguration.cmd with correct settings:
- Restart the target computer.