

Custom objects require the CRM Suite Growth plan or higher. If you have a user-plan based license and want to use custom objects, join the custom objects pilot program.
Add custom data from the top bar
-
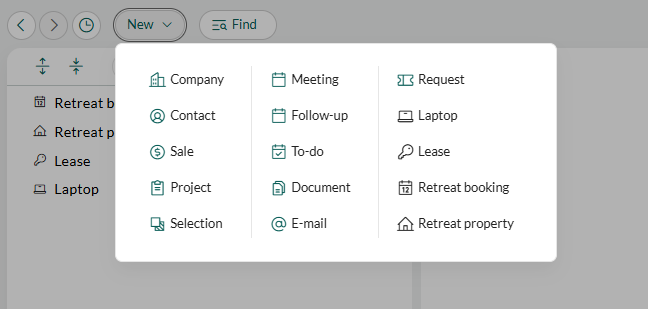
Click New in the top bar, and then select the custom object. For example, Laptop.
-
Fill in the fields. Mandatory fields are marked in red.
For a relation field, such as Company, start typing and select the related record from the list. The list shows a preview of each match, so you can choose the correct one.
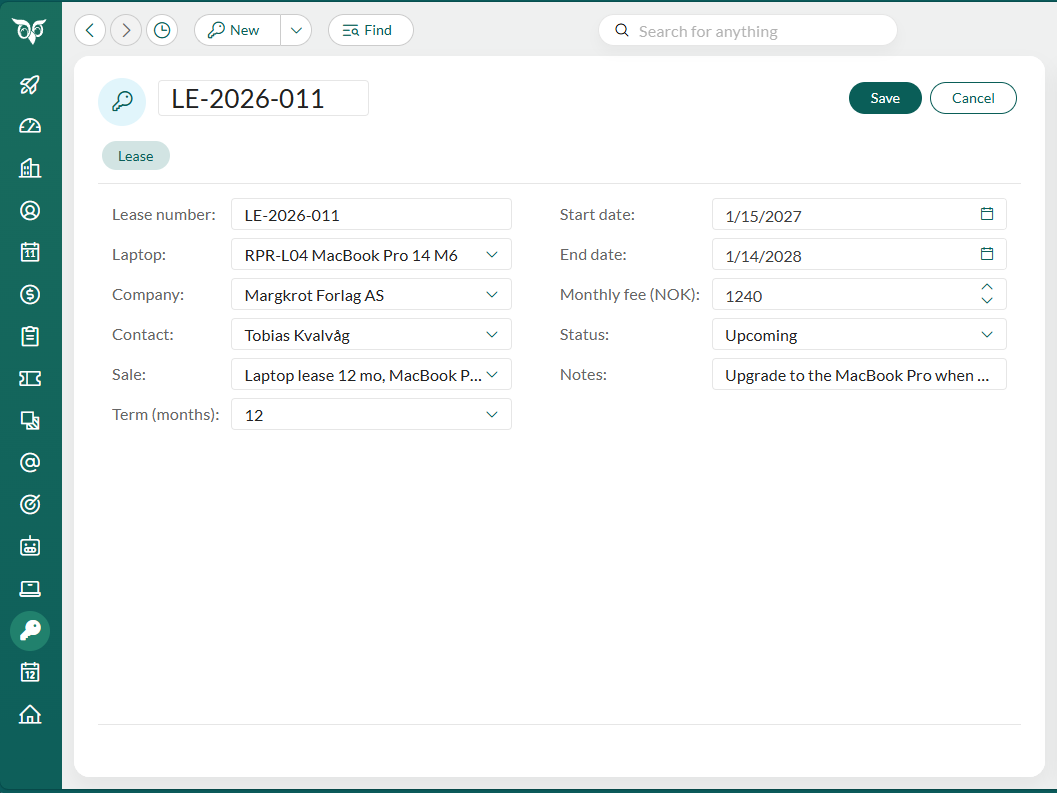
- Click Save.
Add custom data from a related record
When a custom object relates to another entity, such as a company, sale, or custom object, that entity has a section tab for the custom object. Custom data you add there is linked automatically.- Open the related record and select the custom object’s section tab. For example, Equipment.
- Click Add.
- Fill in the fields. The relation to the record you opened is pre-filled, and your administrator can set default values or use a trigger to fill other fields.
- Click Save.