

 You can link sales to companies, contacts, and projects, enabling seamless collaboration across teams. Sales can also be guided using sales guides, assuming the selected sale type has a guide defined.
The Sale screen
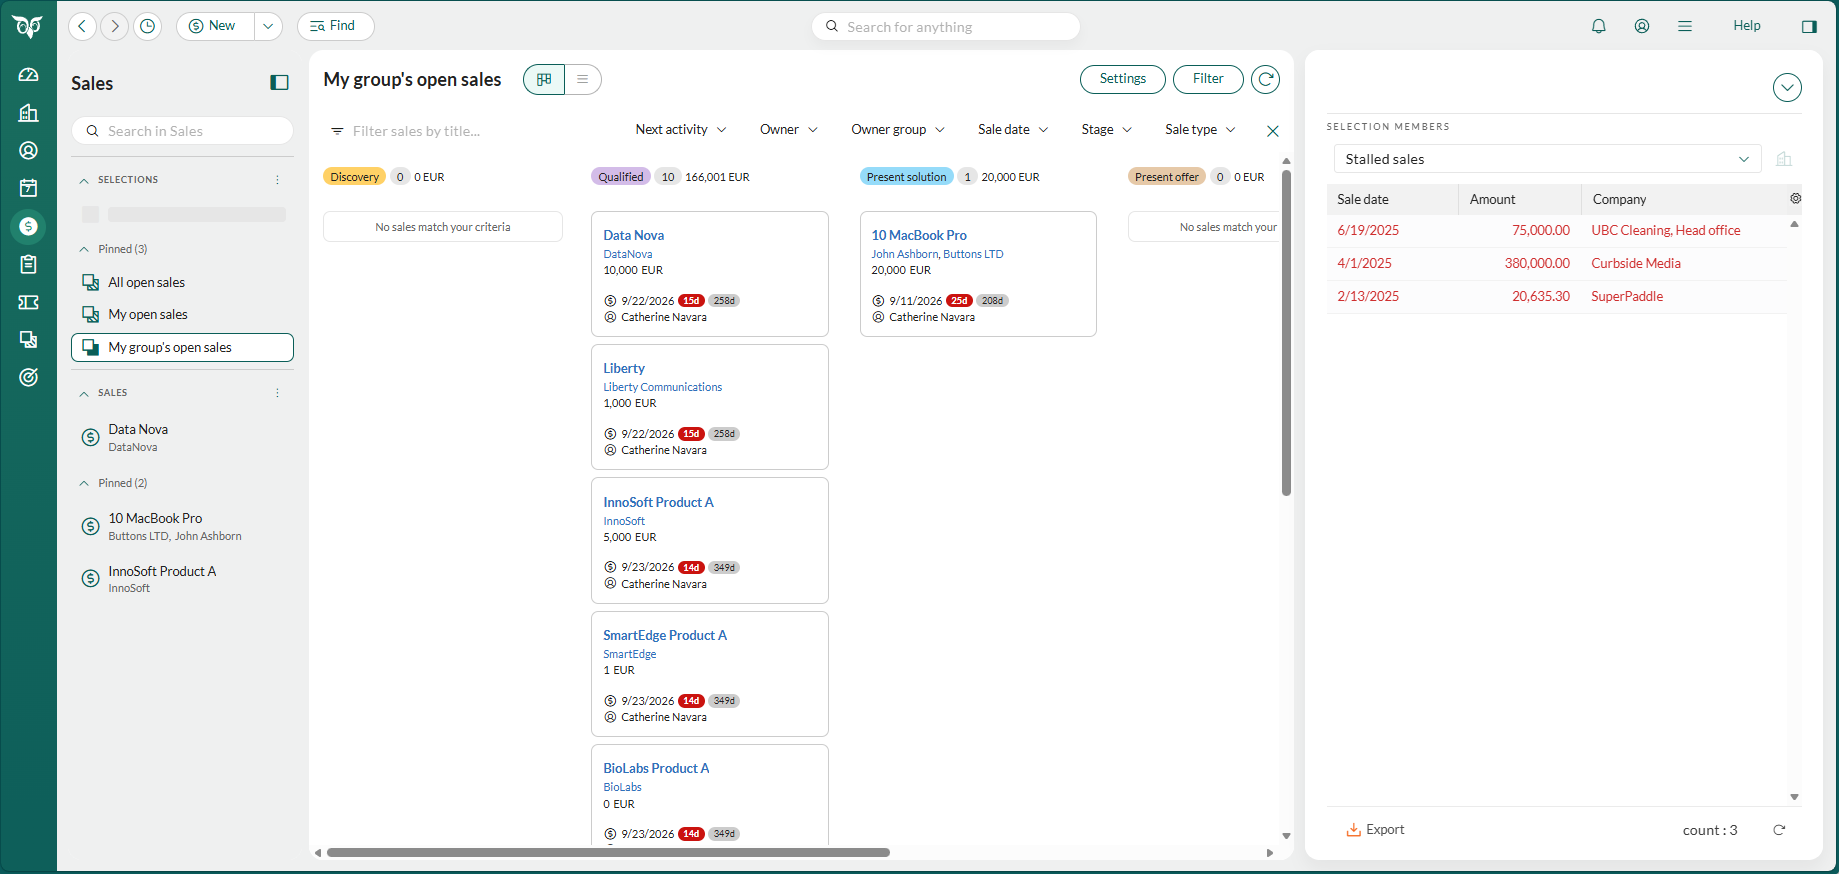
The Sale screen is where you work with your sales and sale selections. It has three areas:- Left panel: Vertical tabs for the selections and sales you work with, and a search field for finding others. Pin the tabs you use every day. See Work with overview pages for how the left panel works.
- Main area: Shows a selection of sales in board view or list view, or shows one sale as a Sale card with section tabs below it.
- Side panel: The side panel on the right shows a preview of the company linked to the selected sale, or the view you have chosen.
The Sale screen is being introduced gradually. If you do not see it yet, a sale opens on its own card, with the section tabs below it and no left panel. You can find a board view of your sales under Selections.
Open the Sale screen
- Select the Sale icon in the Navigator. The Sale screen opens with the content you last viewed.
- Open a sale from anywhere in SuperOffice CRM, for example by double-clicking it in the Sales section tab of the Company, Contact, Project, and Diary screens. The sale opens in the Sale screen and becomes your current sale.
- Select New > Sale. The new sale opens in the Sale screen. When you save it, it opens in the last-viewed tab and becomes your current sale.
What you see the first time
The first time you open the Sale screen:- The My open sales selection is shown in board view.
- My open sales and My group’s open sales are pinned in the left panel.
- The side panel is hidden.
- Your current sale is shown in the last-viewed tab.
Work with selections of sales
Choose a selection in the left panel to see its sales in board view or list view. In board view, the columns are the sale stages by default, and each card is a sale. Double-click a card to open the sale.The Sale card
The Sale card shows one sale at a time. Navigate between sales using the Previous and Next buttons () at the lower right of the card. By default all sales are displayed. If you do not want to show completed sales (sold or lost), click and select Skip completed sales. This option is also available as a setting under Personal settings > Preferences > Sale.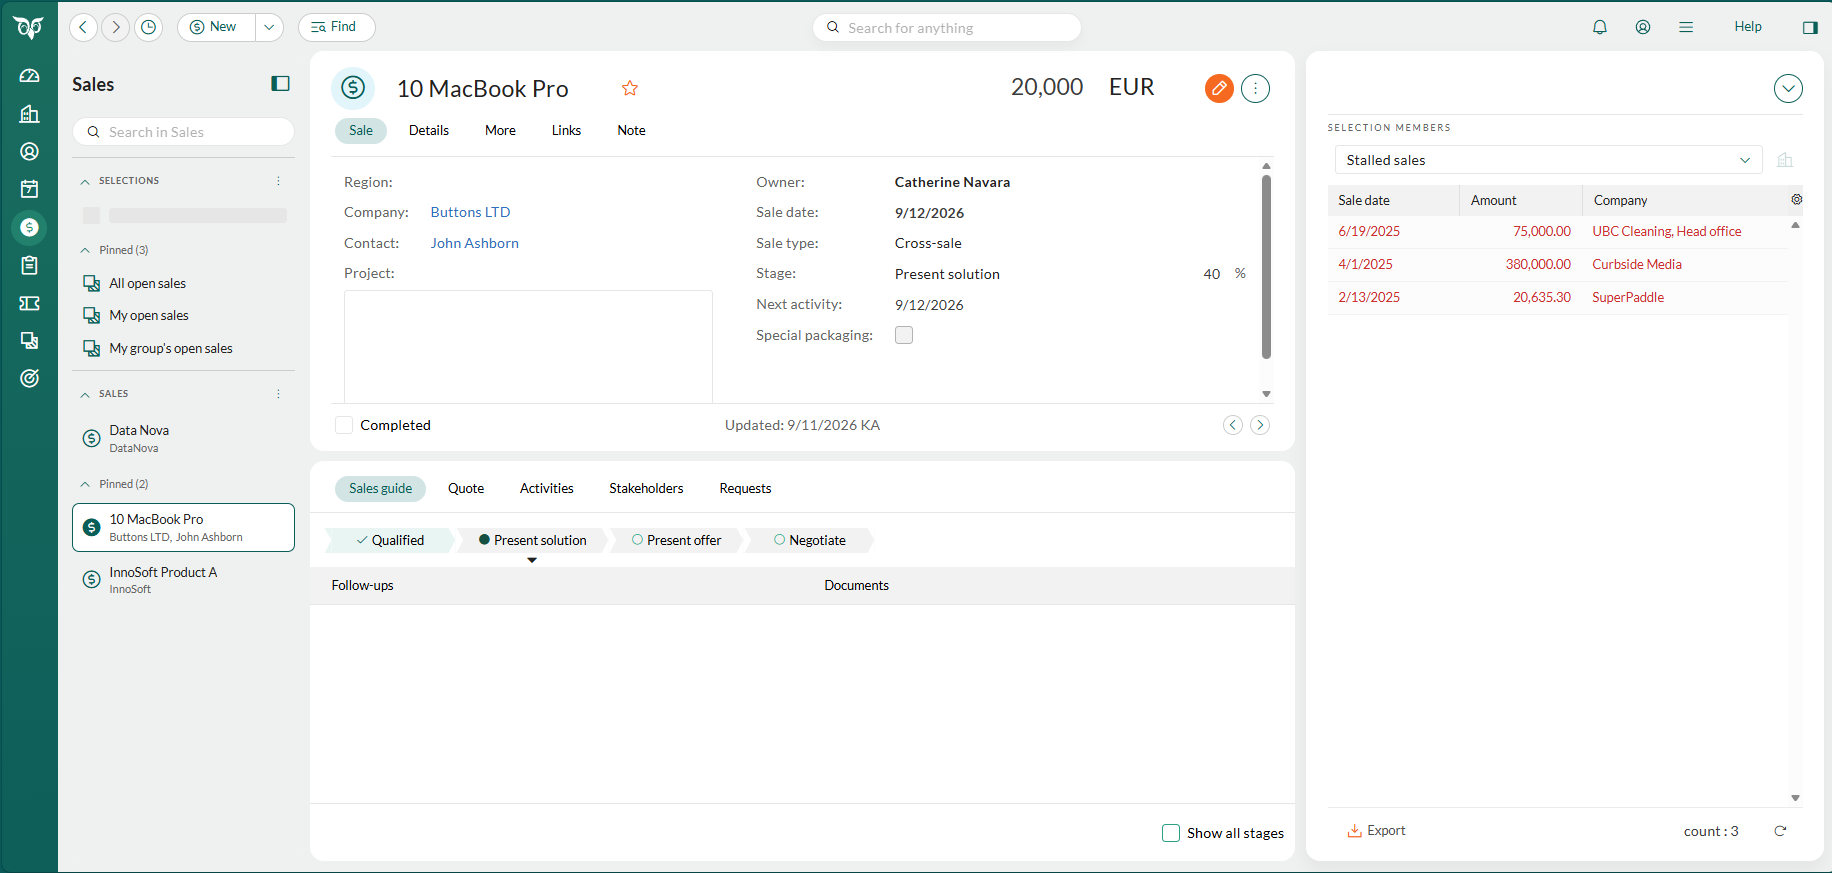
Tabs on the Sale card
Each tab serves a specific purpose, ensuring sales information is organized and easily accessible.
Section tabs below the Sale card
When a sale is open, section tabs appear below the Sale card.- Activities
- Sales guide (requires a Sales Premium license or the Growth plan)
- Stakeholders (requires a Sales Premium license or the Growth plan)
- Quote (requires a Sales Premium license or the Growth plan)
Stalled, sold, and lost sales
In the Stage field on the Sale tab, you can:- Mark a sale as Sold or Lost: This updates the sale’s status and allows you to specify details like competitors or reasons for the outcome.
- Mark a sale as Stalled: Puts the sales process on hold. Additional fields like Re-open date and Reason (stalled) become available.
Tips
Keep your sales organized so that you are always focused on the sales that matter the most to you.- Pin your daily selections. Keep selections such as My open sales pinned in the left panel and view them in board view to see where each sale is in your pipeline.
- Filter to what needs attention. Use the Filter button to narrow the board by, for example, Sale date, Next activity, or Owner.
- Check overdue sales. Sales marked in red have overdue activities or sale dates. Review and update these first.
- Use the Next activity field. It highlights your upcoming planned activities, and shows those you may have forgotten in red.
- Review your sales one by one. Click through them so that you know the current status of each and have an appropriate follow-up activity in place.
- Use selections for follow-up. Use a selection of contacts as a calling list, or follow up on outstanding sales proposals, so that no opportunity is missed.
 For more details on setting up your sales opportunities, see the guide to sales forecasting.