

Complete Set up company sync before you start the steps on this page. Contacts in Visma Net are linked to companies via the ERP customer number, which a company gets only when it is synchronized with Visma Net.
1. Create user-defined fields on the Contact card
Go to Settings and maintenance > Fields > Contact > Add and create the following 2 fields. Set both to Read only.
After adding both fields, click Publish.
2. Create the contact selection
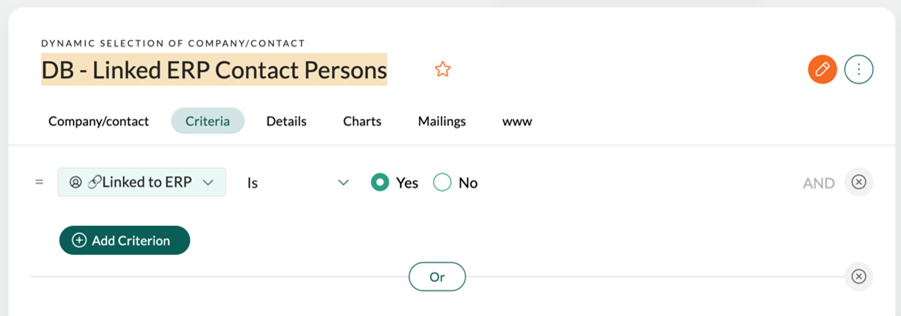
Both contact sync integrations use the selection DB – Linked ERP Contact Persons as their data source. It identifies which contacts should be synchronized to Visma Net. Before creating this selection:- Return to SuperOffice CRM: click the Main menu () and select SuperOffice CRM.
- Open a (test) contact card in SuperOffice.
- Manually set the field Linked to ERP to Yes/True.
- Click New > Selection to create a selection.
- Select Find Contact.
- Add a criterion with Linked to ERP as the field, Equals as the operator, and Yes/True as the value.
- Run the search and confirm the contact you just updated appears in the results.
- Save as a dynamic selection with the name DB – Linked ERP Contact Persons.
3. Add the Contact CRMScript
The CRMScript allows users to manually push or update a contact from SuperOffice to Visma Net.- Go to Settings and maintenance > CRMScript > New script.
- Open the Contact to Visma Net .txt file from crmscripts-visma-net.zip and paste the content into the script editor.
-
Set the configuration variables at the top of the script:
- Save the script.
4. Create the Contact card screen layouts
Standard layout
- Go to Settings and maintenance > Screen designer > Contact.
- Create a new layout for all users.
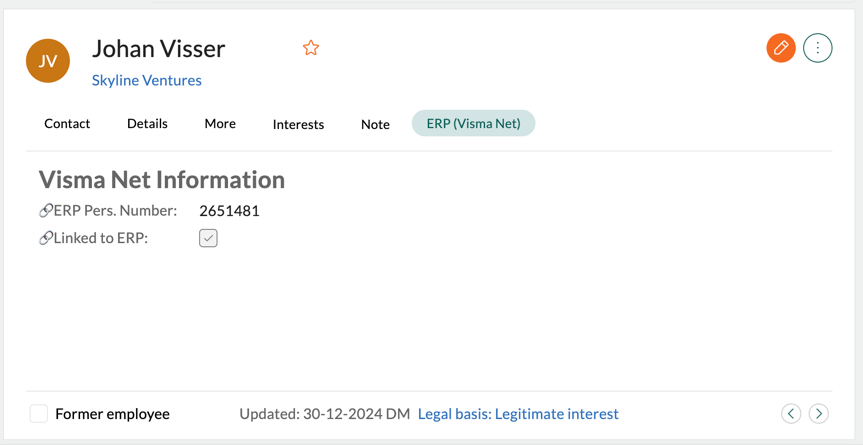
- Add a new tab ERP (Visma Net) with the two ERP contact fields.
- Save and publish the layout.
Admin layout
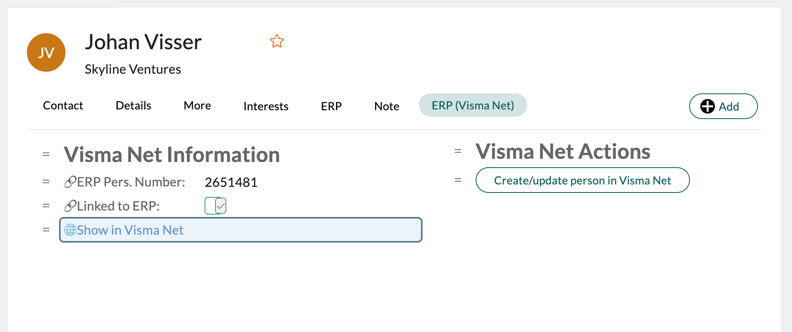
- Create a second layout for users with edit rights.
- Add a button executing the Contact to Visma Net CRMScript, labeled Create/Update Person in Visma Net.
- Add a URL link to the corresponding Visma Net contact screen.
- Save and publish the layout.
5. Import the contact sync integrations
Integration 3: Visma Net Person Sync (Button)
This integration is triggered manually when a user clicks Create/Update Person in Visma Net.- In DataBridge, import the corresponding .ndb file.
- Connect to Visma Net.
- Select the DB – Linked ERP Contact Persons selection as the data source.
- Verify that the customer number field mapping is correct. Contacts are linked to companies using the ERP customer number.
- After saving, copy the Instant Job URL. You’ll need it in Add the Instant Job URL to the CRMScript.
Integration 4: Visma Net Person Sync (Hourly)
This integration runs automatically every hour to synchronize linked contacts.- Import the .ndb file.
- Select the DB – Linked ERP Contact Persons selection as the data source.
- After saving, disable the integration immediately. You’ll enable it in Verify and finalize.
6. Add the Instant Job URL to the CRMScript
- Go to Settings and maintenance > CRMScript.
- Open the Contact to Visma Net script.
- Set the
instantJobUrlvariable to the URL you copied from Visma Net Person Sync (Button). - Save.