

- Select Start page in the Navigator.
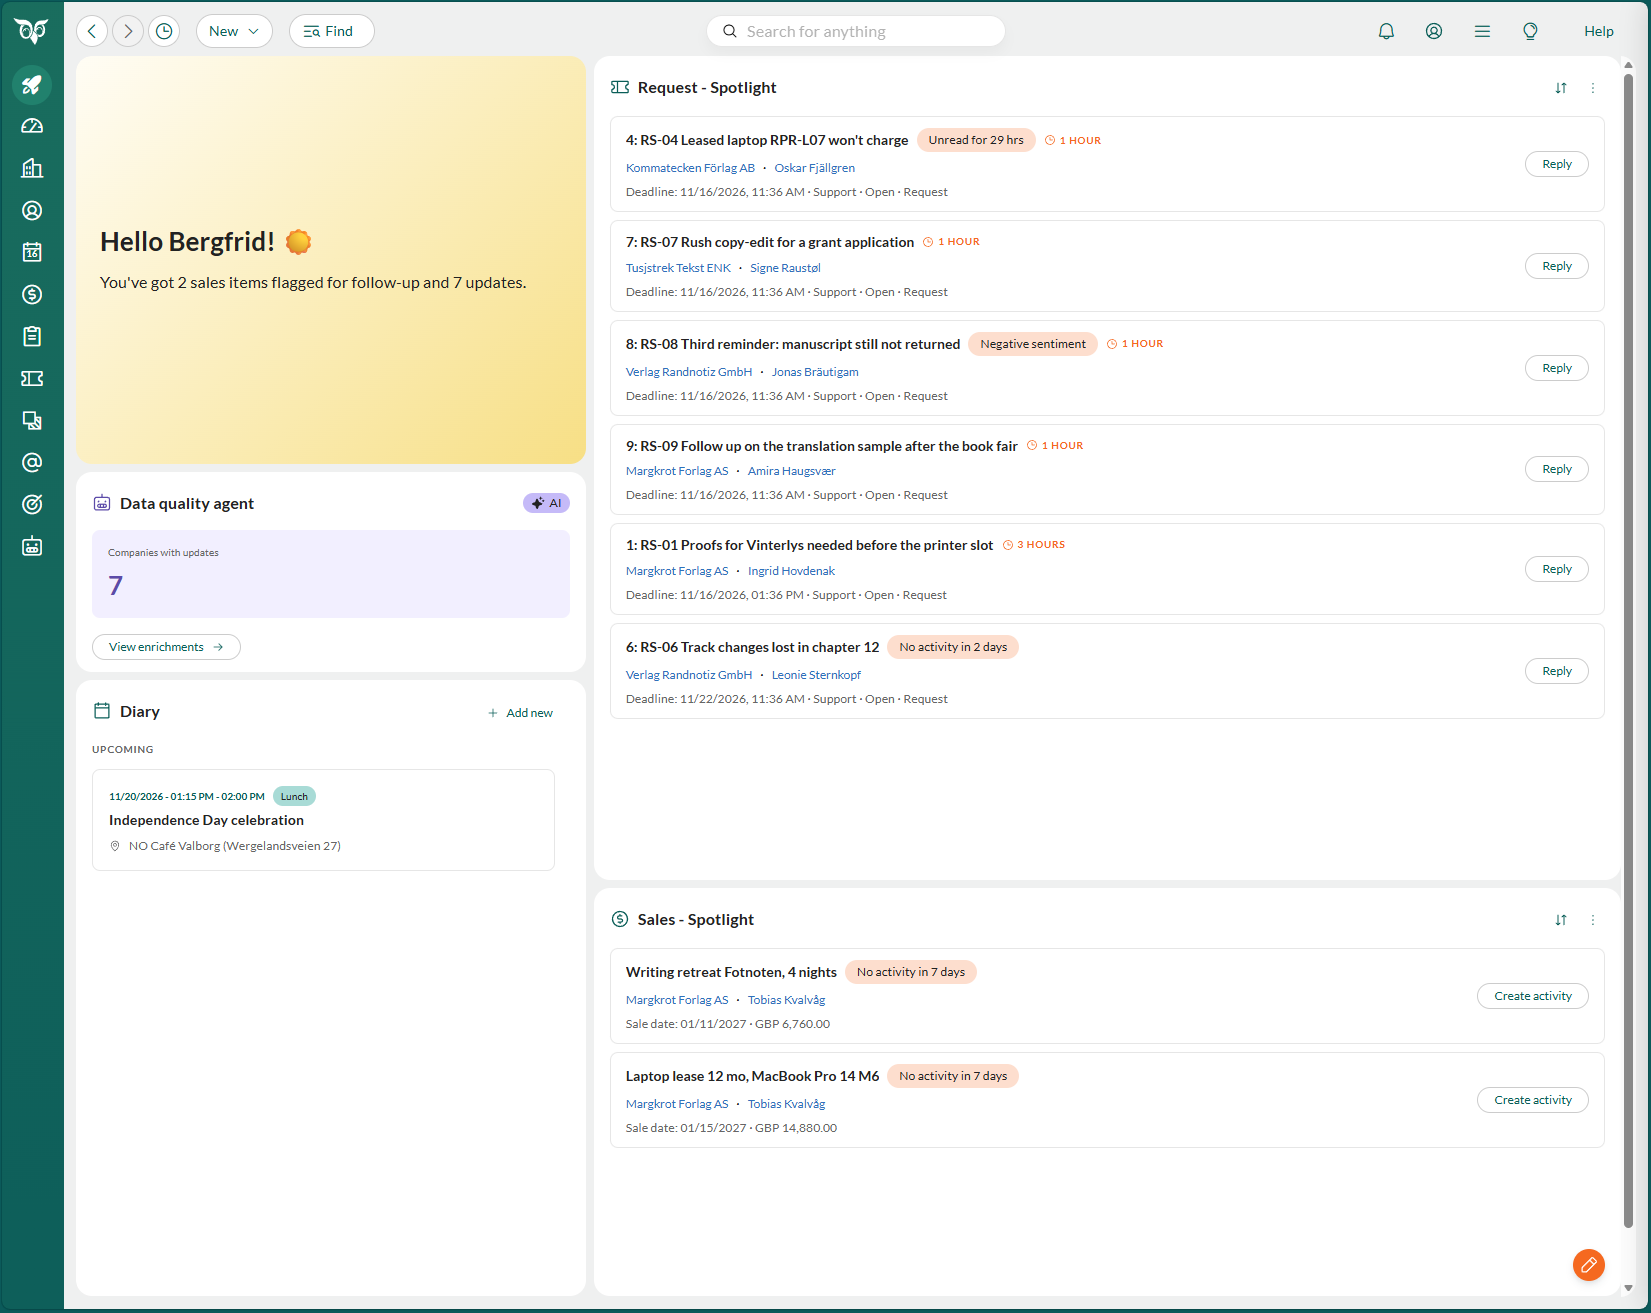
The Start page is available in all CRM Suite plans and is being introduced gradually to selected customers. If you do not see Start page in the Navigator, it is not available to you yet.
Available widgets
You see only the widgets that your plan and your settings give you access to. The agent widgets have additional requirements.
Set up your Start page the first time
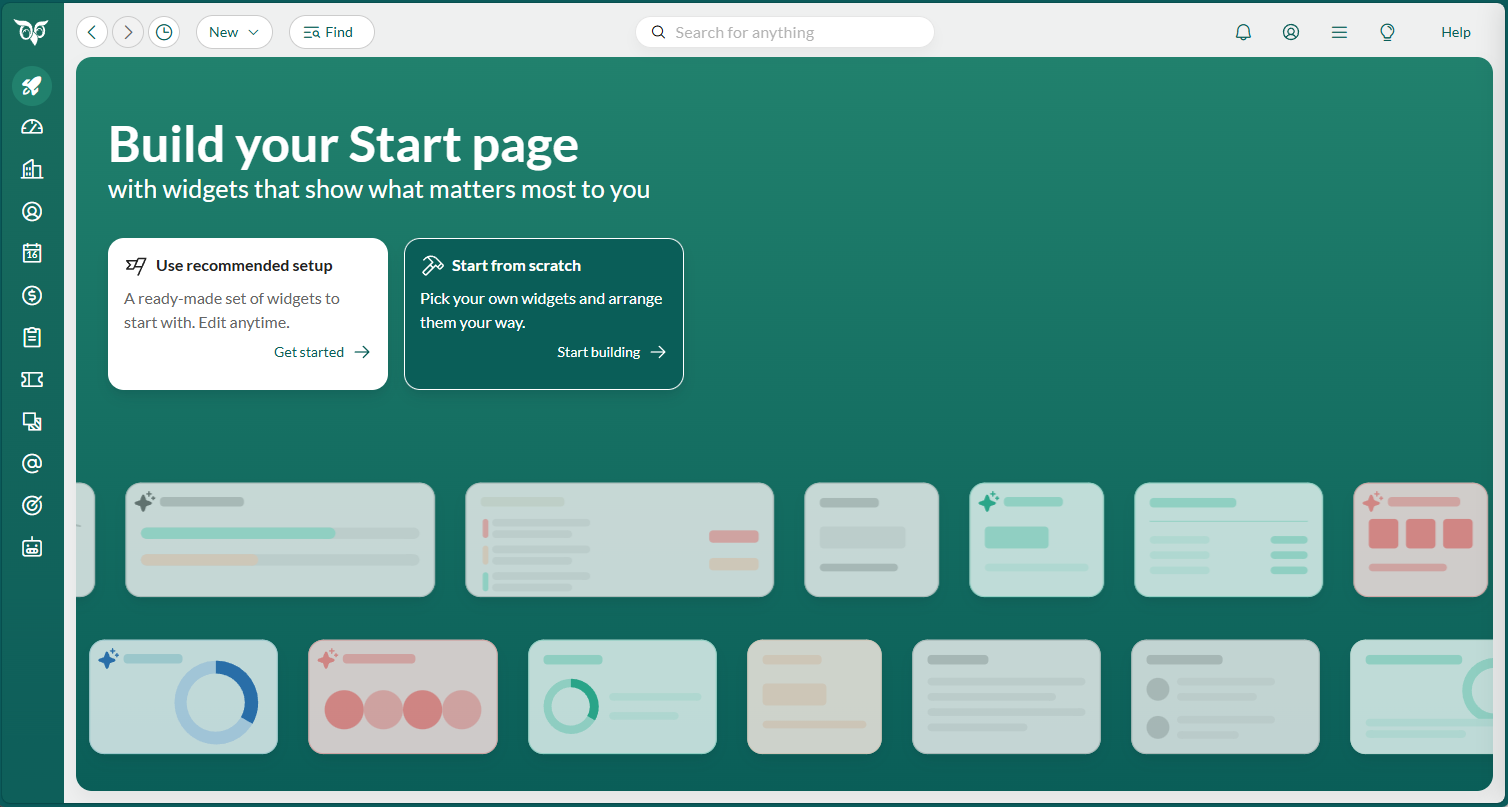
The first time you open the Start page, it has no widgets yet. Choose how to start:- Use recommended setup: Click Get started to add every widget you have access to, in the default order and size. You can change it later.
- Start from scratch: Click Start building to open an empty page in edit mode, so you can add only the widgets you want.
Add a widget
- Click (Edit) in the lower-right corner of the page. The page opens in edit mode, with the Edit Start page panel on the right.
- Point to a widget in the panel and click , or drag it onto the page. A new widget is placed at the bottom of the Start page, at its default size.
- Click Save.
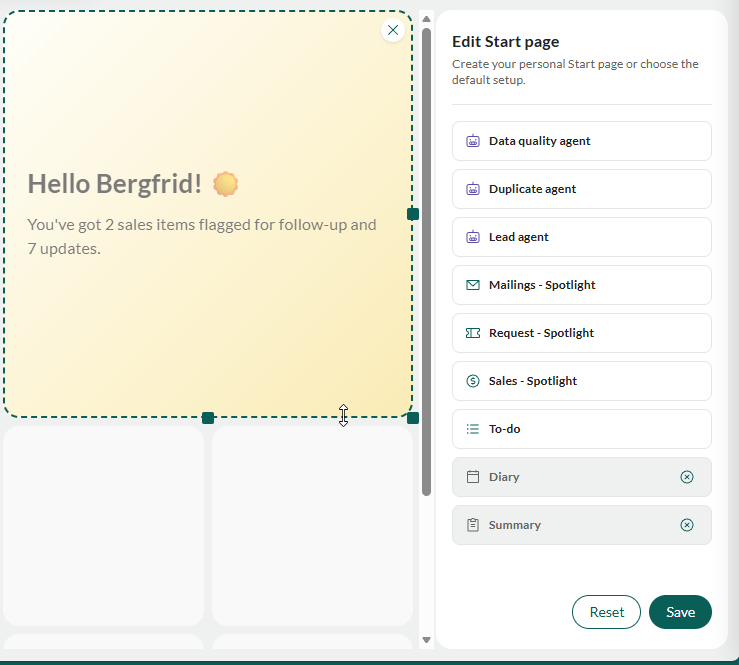 The panel lists the widgets you can add, in alphabetical order, followed by the widgets already on your page. You can add each widget once. Widgets that your plan does not include are not listed.
On a wide screen, the widgets are placed in a grid of 6 columns. On a narrow screen, they are stacked in one column.
Remove a widget
- Click (Edit).
- Click on the widget, or next to it in the panel.
- Click Save.
Move or resize a widget
- Click (Edit).
- Move or resize the widget:
- Move: Point to the widget until the pointer turns into a hand, then drag it to a new place.
- Resize: Point to the widget to show its outline, then drag the handle on its right edge, bottom edge, or lower-right corner.
- Click Save.
Summary
The Summary widget greets you by name and sums up your day in one sentence, for example: “You’ve got 3 meetings today, 2 sales items flagged for follow-up and 4 to-dos due today”.- The summary covers at most 4 things, in this order: meetings today; items in one Spotlight widget; to-dos due today; leads; duplicates; and companies to update.
- It counts only widgets that are on your Start page, and only things that have at least one item.
- Meetings today include the ones that have ended. To-dos that are overdue are not counted.
- When there is nothing to do, it says “You’re all caught up”.
To-do
The To-do widget groups your to-dos as follows: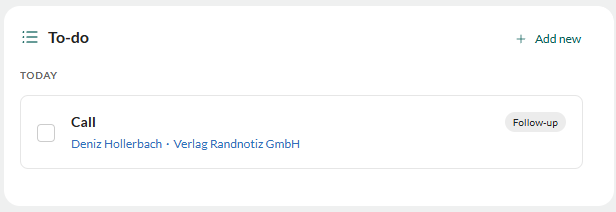 You can do the following from the widget:
- Mark a to-do as done: Select its checkbox. Clear the checkbox to undo. You can complete only your own to-dos.
- Open a to-do: Select it.
- Add a to-do: Click Add new.
- See all your activities: Select the widget title or . The Activities tab in the Diary opens.
Diary
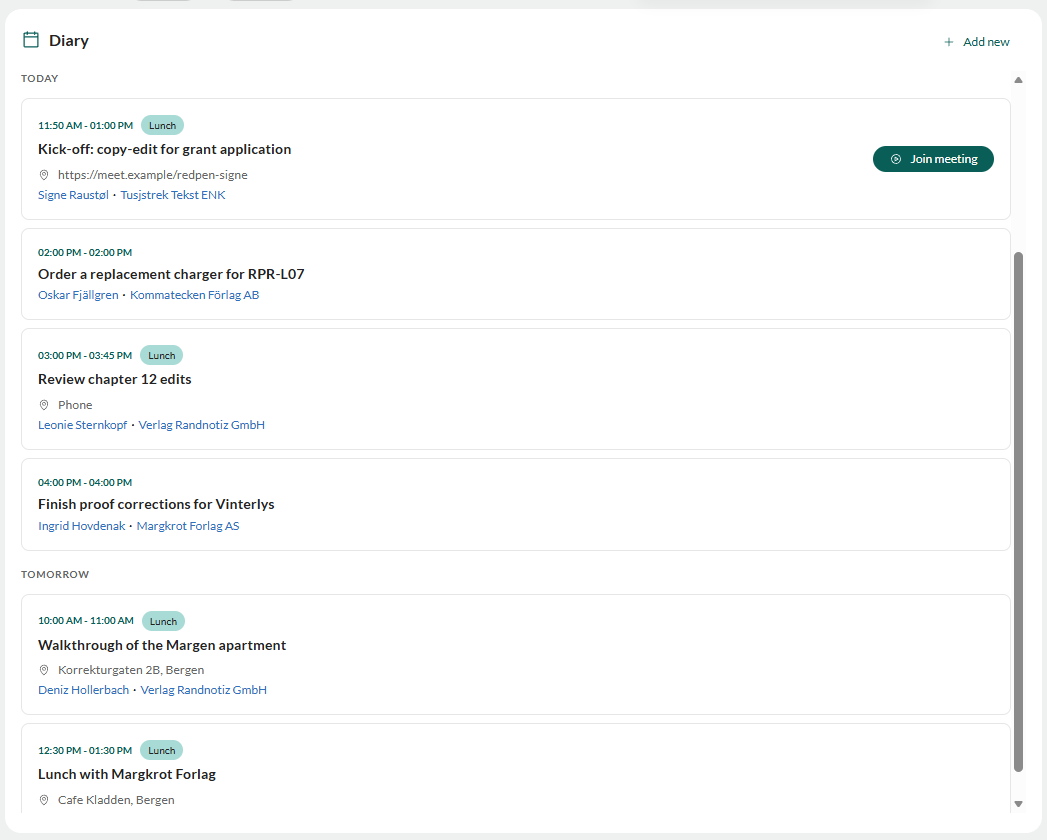
The Diary widget shows your meetings:
Meetings you have declined are not shown. A meeting that lasts several days is shown on each day.
You can do the following from the widget:
- Join an online meeting: Click Join meeting. The button is shown from 15 minutes before the meeting starts until it ends, for meetings with a web link.
- Open a meeting: Select it.
- Add a meeting: Click Add new.
- Open your diary: Select the widget title. The Diary opens in week view.
Sales - Spotlight
The Sales - Spotlight widget shows your own sales with status Open or Stalled that match the criteria you choose. Each card shows the sale, the company and contact, the sale date and amount, and one tag that says why the sale is there. If a sale matches several criteria, the most urgent tag is shown, in this order: overdue, sale date approaching, stalled sale reopening, no activity, no planned activity, no update. You can do the following from the widget:- Edit a sale quickly: Select the card.
- Open a sale: Double-click the card, or select its title.
- Plan the next step: Click Create activity. A new to-do opens, with the contact and the sale already filled in.
- Sort the sales: Click and choose Closest sale date (the default) or Highest amount.
Choose which sales to show
- Click on the widget.
- Turn on the criteria you want and set the number of days.
- Click Save.
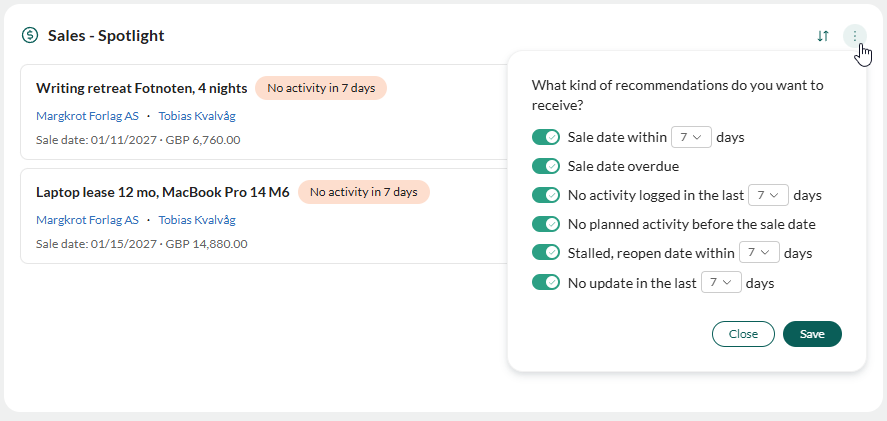
If you turn off every criterion, Sale date within 7 days is turned on again.
Request - Spotlight
The Request - Spotlight widget shows requests you own with status Open or Postponed that match the criteria you choose. It shows up to 10 requests. Each card shows the request ID and title, the company and contact, the deadline, category, status, and type, and one tag that says why the request is there. When the deadline is close, the card also shows the time left, for example “1 HOUR”. You can do the following from the widget:- Reply to a request: Select the card or click Reply.
- Open a request: Double-click the card, or select its title.
- Sort the requests: Click and choose Closest deadline (the default) or Longest without activity. Closest deadline sorts requests without a deadline last.
Choose which requests to show
- Click on the widget.
- Turn on the criteria you want and set the number of hours or the priority.
- Click Save.
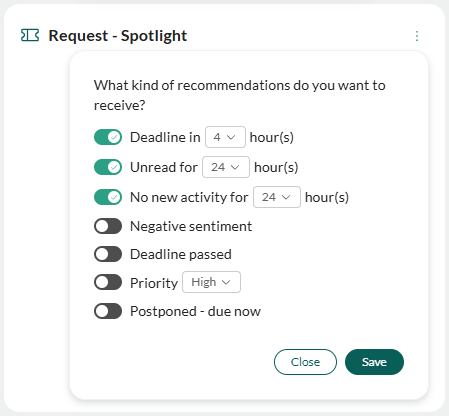
Negative sentiment needs AI text analysis. Without it, the criterion is dimmed.
If you turn off every criterion, Deadline in 4 hours is turned on again.
Unread for N hours and No new activity for N hours use the time the request last changed, not the time of the last message from the customer.
Mailings - Spotlight
The Mailings - Spotlight widget shows email mailings that have finished sending and do not meet your goals. It shows up to 10 mailings, newest first. Each card shows the mailing name, the subscription type, when it was sent, the number of recipients, and the open, click, and bounce rates compared to your goals. A rate is red when it misses the goal and green when it meets it. You can do the following from the widget:- Open a mailing: Select the card.
Choose which mailings to show
- Click on the widget and select Widget filter from the menu.
- Turn on the criteria you want and set your goals.
- Under Subscription type, select the types to include. All types are selected by default.
- Click Save.
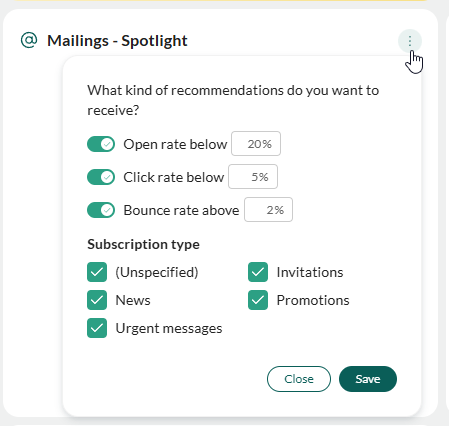
If you turn off every criterion, Open rate below 20% is turned on again.
Choose whose mailings and which period
- Click on the widget and select Mailing settings from the menu.
- Change the settings.
- Click Save.
AI agent widgets
The agent widgets show what your AI agents have found, so you can follow up as you start your day. Each agent widget needs the agent to be active, see Set up AI agents.Lead agent
Shows the leads the Lead Agent has found, one at a time. Click Previous and Next to move between them. The widget shows which lead you are on, for example “1 of 10”. Each lead shows the company name, a rating of 0 to 5 stars with a short label such as “Strong match”, the agent’s summary, and the agent’s name with the time of its last update. Select the company name to open it. For each lead, choose one of the following:- Approve: Accepts the lead. The card is removed.
- Reject: Rejects the lead. The card is removed.
Duplicate agent
Shows how many Company merges, Contact merges, and Orphan contacts the Duplicate Agent has found. Click View merges to review them in the agent. When there are none, the widget says “No duplicates found”. Click Go to agents to open the Agents screen.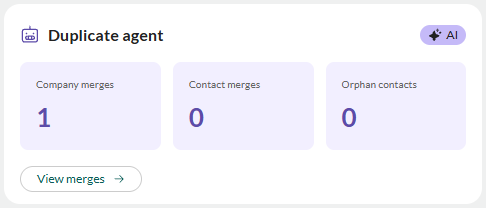
Data quality agent
Shows how many companies the Data Quality Agent has updates for. Click View enrichments to open the agent and review the updates.Requirements
Show the agent widgets
You see the agent widgets when:- Your administrator has enabled AI functions for your organization.
- AI agents are turned on for you. They are on for everyone by default, but your administrator can turn them off.
- You have activated the agent on the Agents screen.